Iperf is a great tool to test bandwidth on both UDP (connectionless) and TCP. Iperf does a great job of showing how much bandwidth it can push through the link between server and client, as well as delay and jitter of the UDP session. You can download it here: http://iperf.fr/
Defaults:
default time it runs is 10 seconds, on port 5001 with a window size of 64k. All settings can be changed
Using Iperf
Using Iperf is simple, run one instance on a server (receiving client) with the -s option and another instance on the testing client (sender) with the -c option.
On the server run:
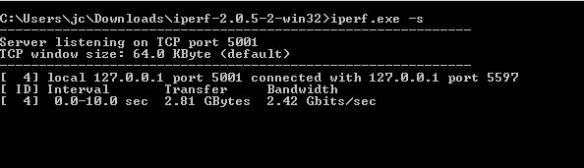
iperf -s – this will then start the server, listening to TCP port 5001 by default. You can change to any port you like.
On the client run:
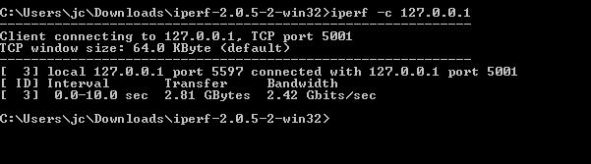
iperf -c x.x.x.x where x is the ip address of the listening server.
Thats it. Iperf will try to push as much traffic as it can with a 64k window size through TCP.
Images are below. Note, this was done on my local machine, so just replace 127.0.0.1 with your test address.
Client:
Server:
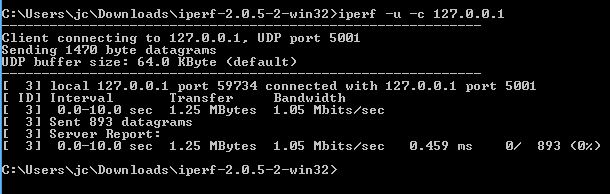
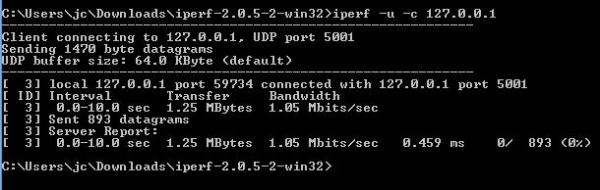
Running a UDP test will usually result in higher bandwidth tests due to UDP not having any flow control mechanisms.
To use UDP instead of TCP use the switch -u.
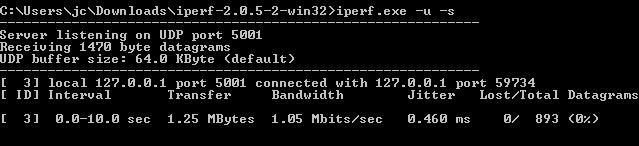
Server: iperf -u -s
Client : iperf -u -c x.x.x.x
Images:
Client:
Server:
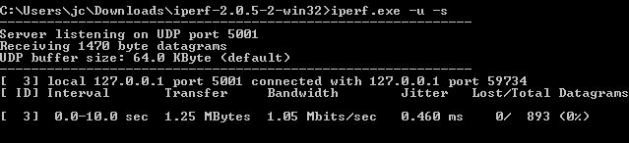
Notice, that the server has both Jitter and lost packets included. This could be very beneficial when troubleshooting link quality for VOIP.
More Bandwidth!
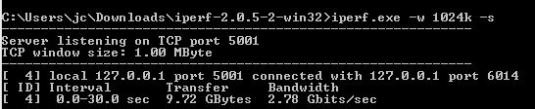
What if you want to completely saturate the link, full stress testing? you can use a combination of both the TCP window size (switch is -w), and parallel streams (Switch is -P ). I would recommend using a max window size of 1024k, and as lets say 7 Parallel streams (running at the same time).
Also, we can change when Iperf reports back to use , we will change it to 2 seconds (switch is -i). For laughs, lets also run this from the default time of 10 seconds, to 30 seconds (Switch is -t). Here are the commands on both server and client:
Client:
iperf -w 1024k -P 8 -i 2 -t 30 -c 127.0.0.1
Server:
iperf -w 1024k -s 127.0.0.1
Images:
Client:

Server:
Other Switches
Iperf has a lot important switches but here are a few I use a lot:
– B – Bind to a host/interface – Great to use if you have multiple IPs on the machine, and just want to test with one
– P – Runs more thread in parallel, can totally flood network with as much traffic as possible. Great for stress testing.
– D – used for testing both send and receive at the same time.
– i – how often iperf reports back to you about transfer
– t – amount of time iperf runs and sends data.
– w – Window size, can be specified in kb or mb.