This is an amazing method for getting users in their correct groups in Fortigates. This way we can apply different security profiles to individual groups, all through one 802.1x login. This example is using Ruckus wireless , but will work exactly the same for any wifi vendor..
This method works by using 802.1x WPA2/AES logins on the Ruckus , and passing the users info over to the Fortigate by Radius accounting. Then on the Fortigate we are using RSSO (Radius single sign on) groups to collect the username/group that is sent to the Ruckus by the Windows NPS server. Lots of moving parts here, but it is really simple. I have had problems finding good documentation about Fortigate’s RSSO profiles – but they work great.
The goal of this project/entry is to have the Fortigate know the Username, IP and group (if assigned) of the user who just authenticated to the wireless network. Once you know these things you can apply different UTM policies to users VIA RSSO groups in the Fortigate. There are many good scenarios and uses for this – one example that I have is for a school network. I set this up recently for a school that has students and faculty authenticate through the same Ruckus controller, but to different 802.1x WLANs (SSIDs: Student and Faculty). The fortigate can then apply correct policies to each user (student or faculty) and therefore lock down student web surfing much more than a faculty member. You might be saying – you could just use captive portal on the fortigate,with LDAP groups. I would say yes, but that is another step users have to take, and its called “Single Sign on” for a reason.
So what is needed to make all this happen: Ruckus wireless using 802.1x, NPS (or any radius server) , Fortigate – that’s it.
I am going to assume that we already have Ruckus using 802.1x and NPS with no problems.
I had trouble at first setting this up, because I thought that that the NPS server should send the radius accounting info to the Fortigate, I was wrong. The controller is the Authenticator – therefore the device that knows about the authentication, and needs to pass on the info to the Fortigate. The Authenticator (Controller) needs to send the radius accounting info to the Fortigate.
That means you have a AAA server setup on the controller for 802.1x authentication, and a AAA radius accounting server pointing to the Fortigate.
Setup Radius accounting between Ruckus and Fortigate
First we need to create the connection between Ruckus and Fortigate via radius accounting.
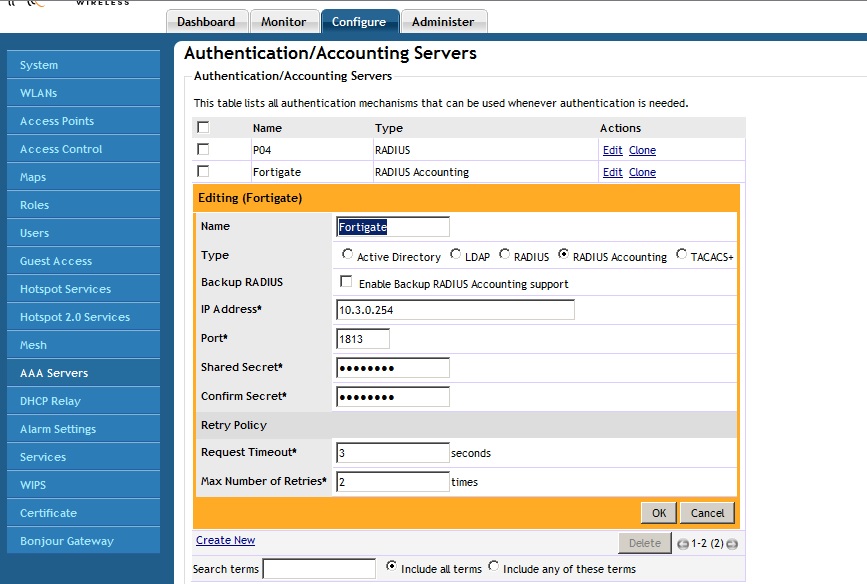
On the Ruckus system, go to Configure – AAA servers – create a new server. Then click the box that says “Radius accounting” Fill in the IP of your Fortigate, and create a PSK between the two.

Next on our Fortigate we need to create a RSSO profile for the Ruckus system.

Feel free to name this Ruckus or whatever. The PSK has to match what you created on the Ruckus system. By default the RSSO profile uses the Class variable to match the users. You can change what to match, for example you could match by NAS-Port, User-Name, Class, etc.
So, if we go into CLI we can modify many of these settings. Below are the settings I have used
config user radius
edit “Zonedirector”
set rsso enable
set rsso-secret ENC eoTXOqectoW0sjb5lLVW/7rr3BB0DocxlKeW64yfoIq7NTblyMc1TT9/V2M8m2LJmotwNrDYS+hOBSWV68wWULjuT88tOZHli7Nqqe8k5hoK4iHmLuG6x9R7apR9b+JU6O48mY8jiUaf48pY8wamagNdOALtrew6k+yWFzfd7gzo+qgag2sOI+Q46GnI1ybGPo6YQQ==
set rsso-endpoint-attribute User-Name
next
end
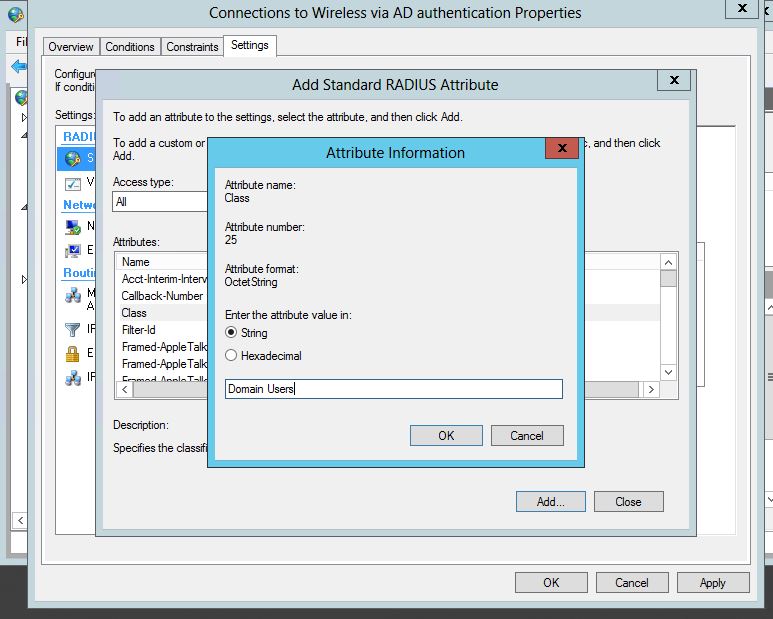
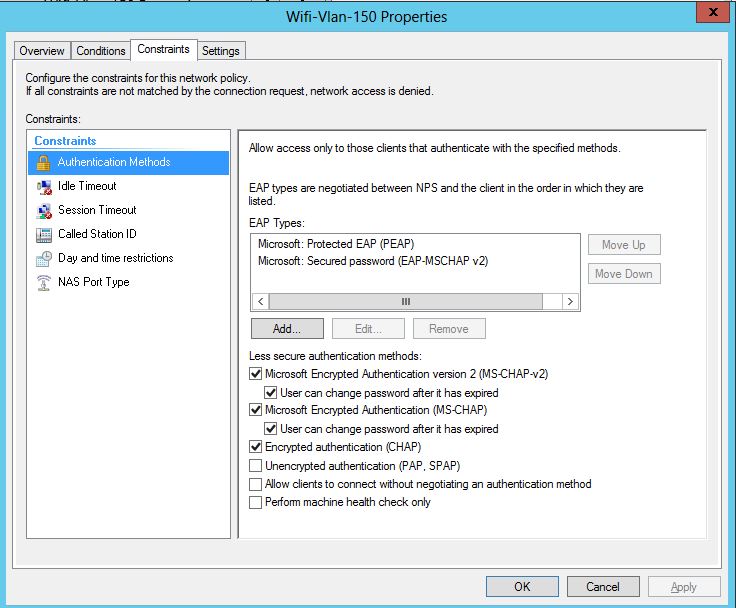
Next we need to modify NPS to send the values that we will match on the Fortigate. In this example I am matching I am saying that if any Domain users authenticate through the ZD, then send the IP/Username/”Tag” to the Fortigate so it knows who to apply the correct firewall policy to. My “Tag” I am sending in is the Class Variable of “Domain Users”.. Something to note is this is not the given AD group, but a variable I am assigning that just references the group. I could say “Social media” if I wanted, then match on that.
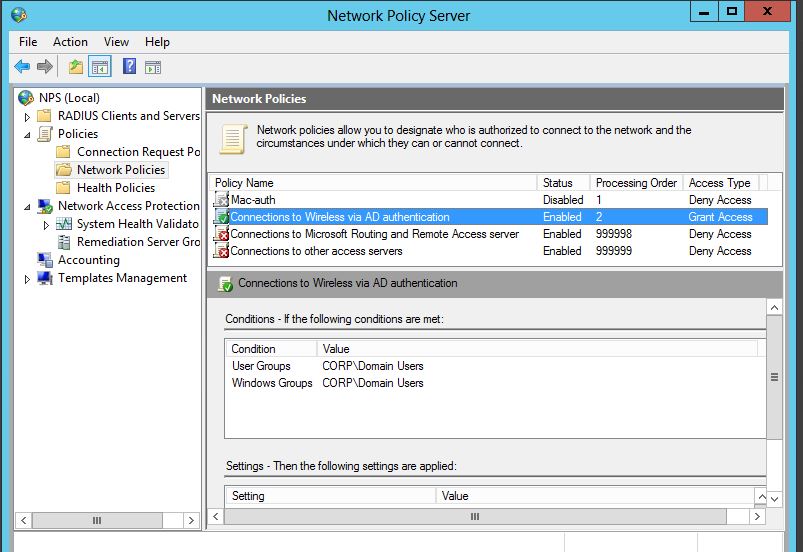
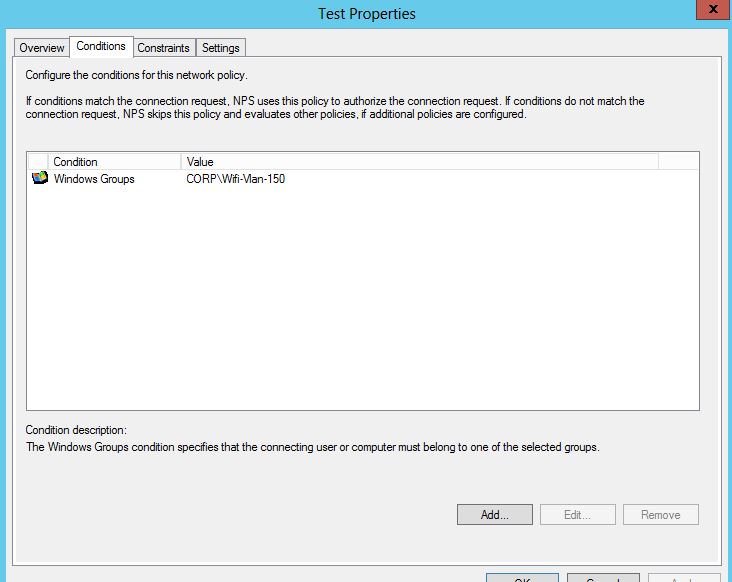
So lets modify the Microsoft NPS policies to reflect what we need.
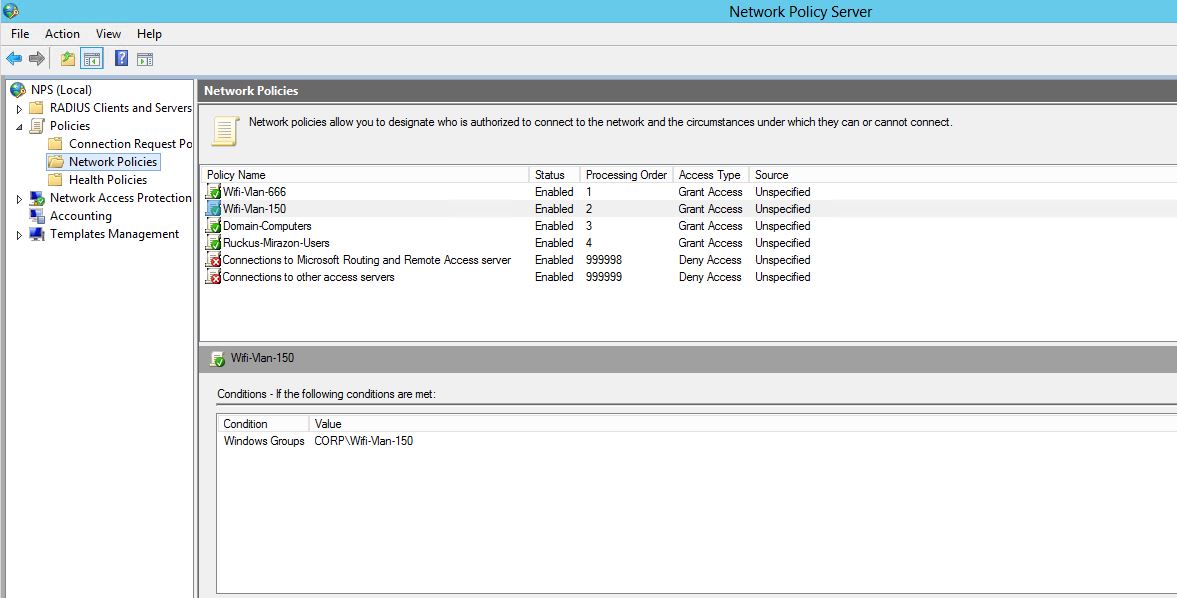
Remember, we are going from the assumption that 802.1x is up and working, and NPS is great. So, how do we match a variable from NPS on the fortigate? We could really use a ton of different variables. Lets use the class variable. To assign the class variable we will modify the the Network Policy in NPS that we want to apply a to a certain criteria.

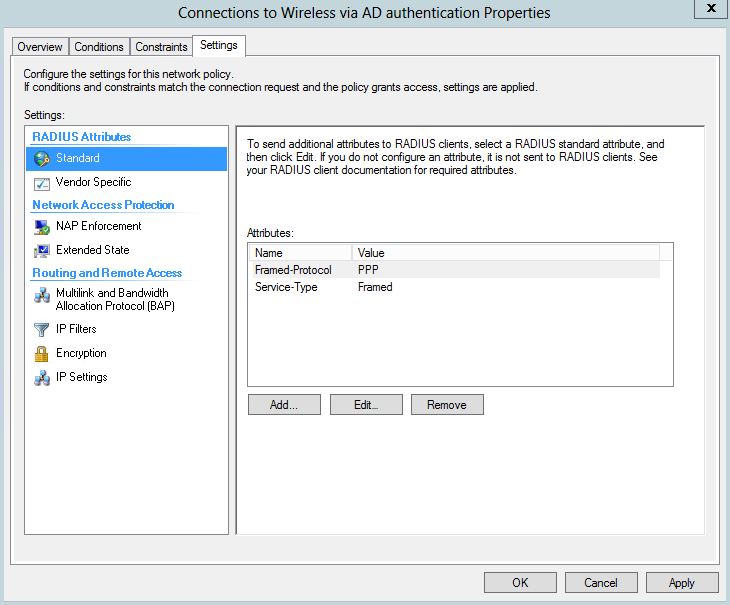
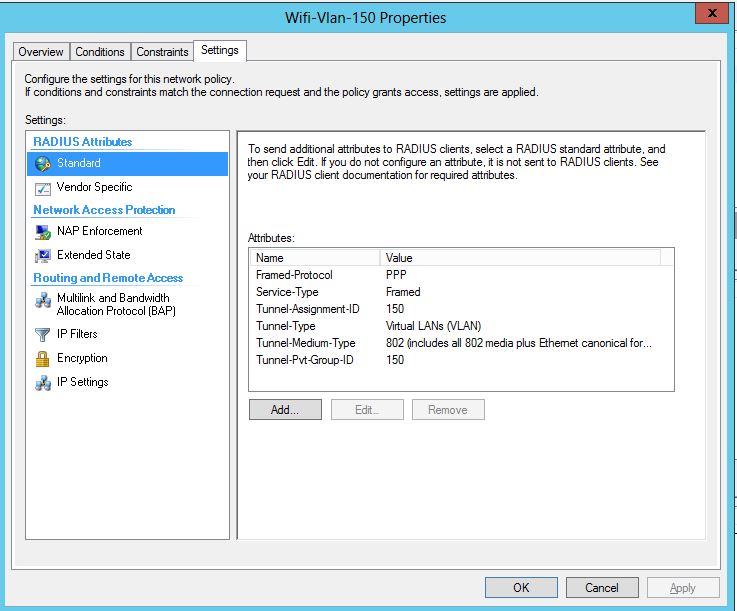
I will modify my “Connections to Wireless VIA AD Authentication” Policy. Then once, you edit the policy and go to “Settings” tab, there will be a few attributes already listed . You may have some already or not. We will add the “Class” variable, and then assign it to what ever value we want to match in the firewall group. In this case I am setting my value to “Domain Users”.

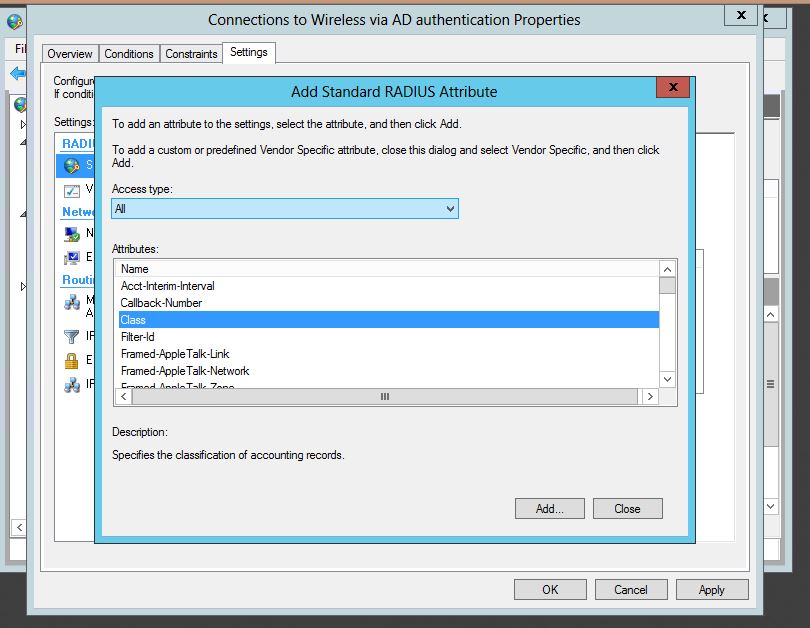
So from the settings tab, lets click “Add” under the Radius Attributes standard section.

Select “Class” from the list of attributes that comes up, it will then ask you to enter a string that you want to set. This is the Keyword you will use to match the user to group in the Firewall. Just like use a FSSO group and matching the domain group. Some examples might be students vs teachers, or Domain users.

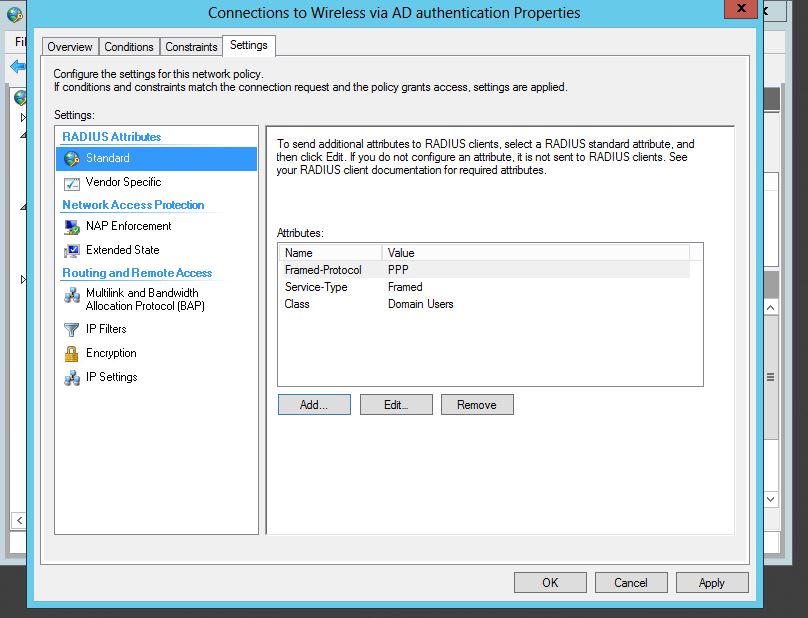
Press OK, and now we have the variable added, you can confirm as seen below:

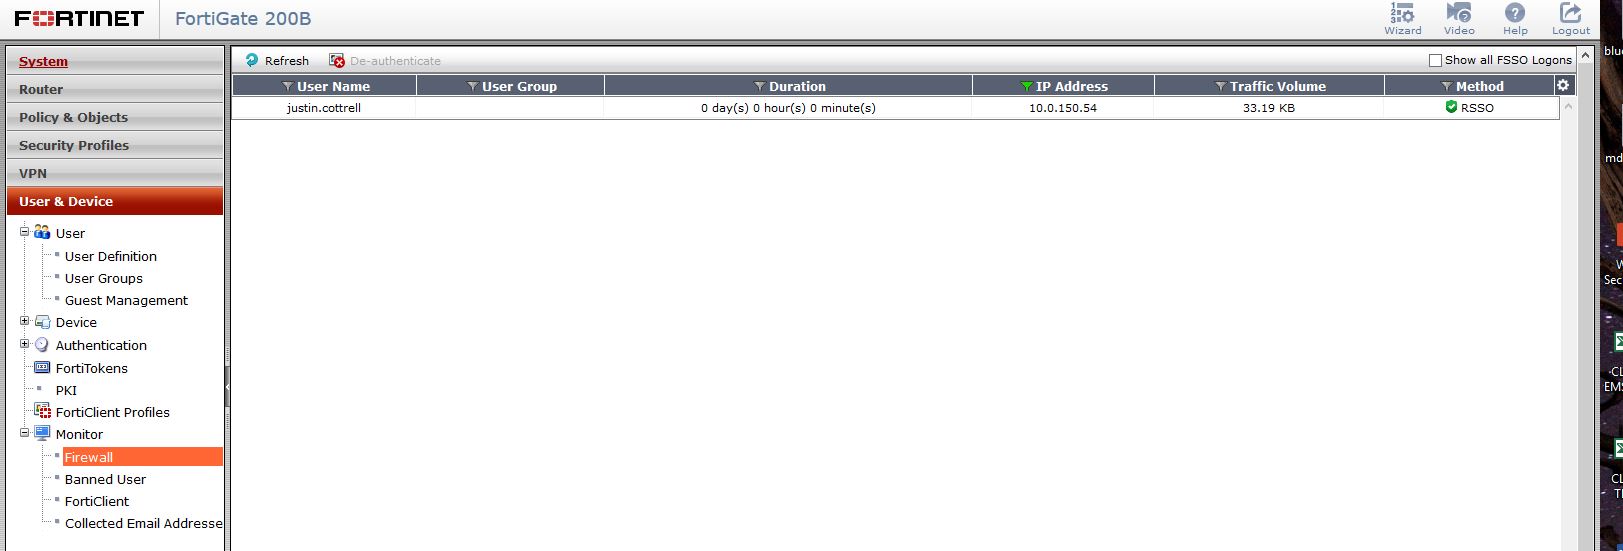
Great, now we have the hard part done. Now, have some users log in to wireless, and see if you get correct RSSO users found in the firewall. you can check this my navigating in the firewall to User&Device – Monitor – Firewall

Awesome, it found my username, and my IP, but my group is blank, how can you apply a policy to user if they have no group? The answer – is just the same as the FSSO. If you do not have a firewall policy that references the Radius group that you created then no group, no filtering, nothing. So you need to create a new firewall policy and select the RSSO group you created as the source group. In my example the group is called Radius Domain Users.

To show a policy example check out below: My domain FSSO is above my RSSO policy.

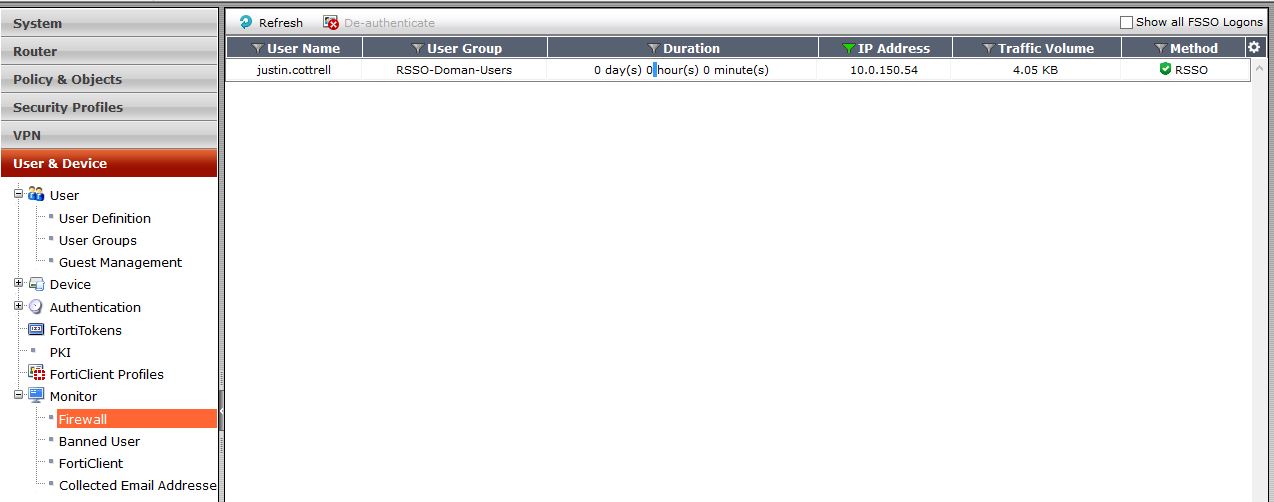
Now that that is created and enabled, lets check the user monitoring – BAM! there it is, my group included.

Using RSSO and 802.1x is awesome, it allows you to kinda use a single pane of glass aspect and have Firewall, and Wireless be able to know who the user is just my them logging into the wireless network. Also, using 802.1x for wireless authentication and Key management is very secure. Having users known that are on wireless no matter what device can really be beneficial in reporting, either through Forticloud of FAZ.