Logging into the firewall with Active directory accounts can be a great thing. You can base login privileges on A.D. security groups, and track what the users do. For example if you had help desk users and only wanted them to only have read access, no problem. Also, what if you wanted to audit what a user does on the firewall, no problem. You can do this through a mix of Logins and admin profiles.
There are a few things we need to do, create the LDAP connection, create our security groups in A.D. to match in the firewall, create the user group in the FW and assign it the correct admin profiles.
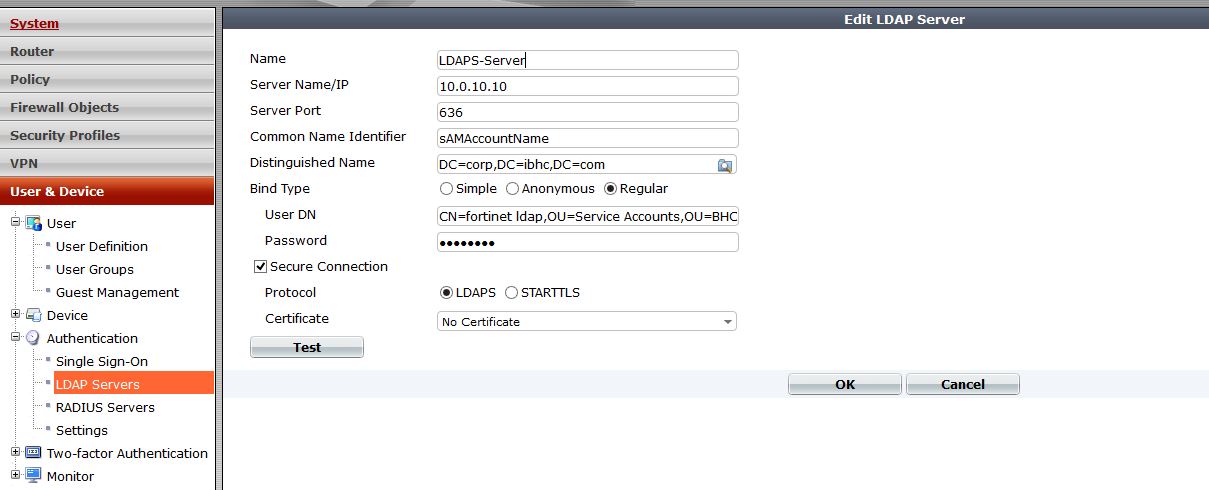
1. Create the LDAP connection
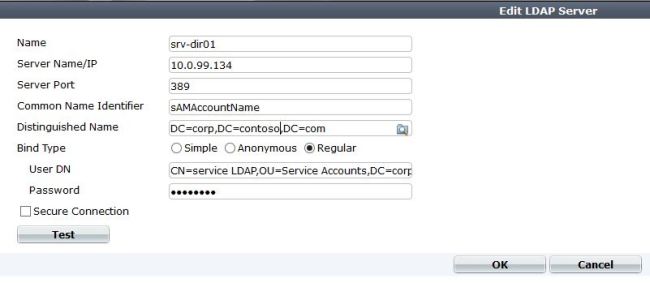
You do not have to be a super user to query the LDAP account, I would just create a Fortinet service account, and use that to query with.
2. Create AD security groups. If you want domain admins to log in, great just match it in the firewall. If you have help desk users that you want to have restricted privilege than you would have to create that in A.D. and add the needed members.
3. Create local firewall groups that match the LDAP groups.
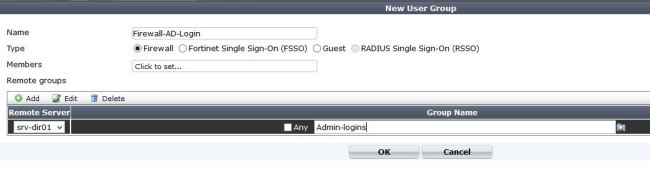
Here we create a “Firewall” Group, and add our remote server to the list. If you notice you can query LDAP from here, and select the group you want by clicking on the folder to the left side of the group name.
4. Add the group as a admin that can login
Under system – admin – administrators add a new admin.
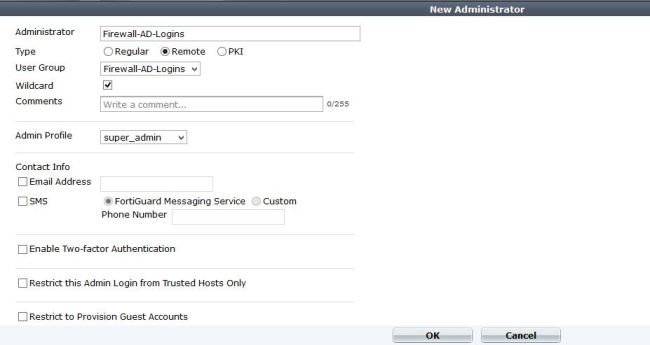
Create the name you want, and select the group we just created. Then select the admin profile we want. This is for admins, so they will be super admins when they log in. If you wanted a custom profile, lets say restart the device, but that’s it then we can create that, then add it. There are more options here such as using Forti-token, and email.
Notice that the wildcard option is checked – A wildcard admin account is an administrator account with the wildcard option enabled. This option allows multiple different remote administration accounts to match one local administration account, avoiding the need to set up individual admin accounts on the FortiGate unit. Instead multiple LDAP admin accounts will all be able to use one FortiGate admin account.
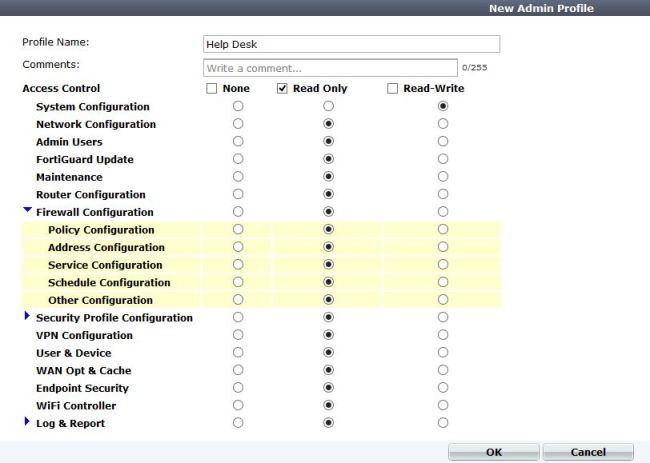
5. Create a different admin profile for privileges.
In this example I will create a help desk account, that can only configure system settings (IP address, etc). Otherwise everything is read only.
After saving this, you can go back and add it to the admin group.